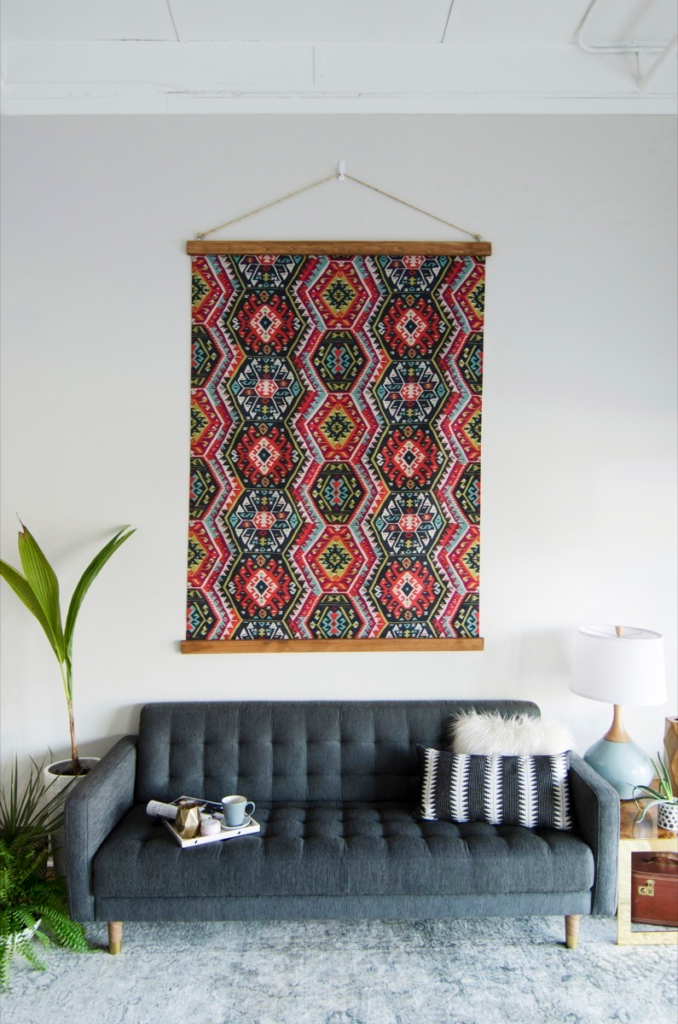
Fabric wall art is a beautiful way to add texture, color, and personal flair to your home decor. Unlike traditional framed art, fabric wall art can be customized to fit your style and can bring warmth and depth to your living spaces. In this blog post, I will guide you through the steps to create stunning fabric wall art that will brighten up your home.
Materials Needed
To get started on your fabric wall art project, you will need the following materials:
- Fabric: Choose fabrics that match your decor style. Cotton, linen, or upholstery fabric can work well.
- Canvas or wooden frame: A blank canvas or a wooden frame will serve as the base for your art.
- Staple gun or fabric glue: For attaching the fabric to the canvas or frame.
- Scissors: To cut the fabric.
- Batting (optional): If you want to add dimension to your art.
- Embroidery hoops (optional): For a circular design.
- Paint or other embellishments: To personalize your fabric art.
- Measuring tape: For precise measurements.
- Ruler or straight edge: To help with cutting straight lines.
Choosing Your Fabric
The first step in creating fabric wall art is selecting the right fabric. Consider the colors and patterns that will complement your existing decor.
You can opt for bold prints to make a statement or soft, muted colors for a more subtle look. Mixing different fabrics can also add interest; think about combining textures like velvet, burlap, or cotton.
Preparing Your Canvas or Frame
If you’re using a canvas, ensure it is clean and free from dust. If you prefer a wooden frame, you may want to paint or stain it to match your desired aesthetic.
If you want your art to have some dimension, consider laying a piece of batting on the canvas or frame before adding the fabric. This will give your wall art a padded look and feel.
Cutting the Fabric
Once you have your fabric chosen and your canvas or frame prepared, it’s time to cut the fabric. Measure the dimensions of your canvas or frame, and cut the fabric to size, leaving a little extra on each side to wrap around the edges.
If you’re using multiple fabrics, plan out how you want to arrange them before cutting. You can create geometric shapes, stripes, or any pattern that fits your vision.
Attaching the Fabric
Now it’s time to attach the fabric to your canvas or frame. Lay the fabric over the surface and ensure it is centered and smooth.
If you’re using a canvas, fold the edges of the fabric over the back and use a staple gun to secure it in place. Start in the center of each side and work your way to the corners for a tight fit.
For a wooden frame, you can either use a staple gun or fabric glue to secure the fabric. If you choose to use fabric glue, make sure to follow the instructions on the bottle for drying times.
Adding Embellishments
Once your fabric is securely attached, it’s time to add embellishments to enhance your wall art. You can use paint to create patterns or designs directly on the fabric. Stencils can help you achieve precise shapes and letters.
Other embellishments, like buttons, ribbons, or beads, can also be sewn or glued onto the fabric for added texture and interest. Feel free to let your creativity shine as you personalize your fabric wall art.
Framing Your Art (Optional)
If you prefer a more polished look, consider framing your fabric art. This can be done using a simple frame that complements the fabric colors.
When framing, ensure the glass does not touch the fabric to avoid any damage. You can use spacers to create a gap between the glass and fabric, allowing for a more dimensional look.
Hanging Your Fabric Wall Art
Once your fabric wall art is complete, it’s time to hang it on the wall. Choose a prominent location that will showcase your creation.
Use a level to ensure your art is straight when hanging. Depending on the weight of your art, you can use nails, hooks, or adhesive wall strips to secure it to the wall.
Creating a Gallery Wall
For added impact, consider creating a gallery wall with multiple pieces of fabric art. Mix and match different shapes, sizes, and colors for a vibrant display.
Arranging the pieces on the floor before hanging them can help you visualize how they will look on the wall. Keep the spacing between each piece consistent for a polished finish.
Maintenance and Care
To keep your fabric wall art looking its best, dust it regularly with a soft cloth. If you used any paint or glue, ensure that they are suitable for fabric and won’t fade over time.
If your fabric art gets wrinkled, gently steam it to remove the creases without damaging the fabric.
Conclusion
Creating fabric wall art is a fun and creative way to personalize your home decor. By choosing the right materials and letting your imagination run wild, you can create stunning pieces that will bring life and character to your space. Enjoy the process of crafting and decorating, and let your fabric wall art tell your unique story!


